When to Create a Custom Flow
Custom flows are ideal for automating specific business processes:- Lead Generation Submission: Use a Collect Node to gather user information (e.g., name, email) and an Action Node (HTTP API or Email) to send the data to a CRM or lead management system like HubSpot.
- Leave a Message or Contact Us: Collect customer details using a Collect Node when a Live Agent is unavailable, ensuring your customer service team can follow up later.
Steps to Create and Design a Flow
The key components of a conversation flow follow a standard pattern: Trigger → Action (Collect/Branch/Message) → Send Information (Action Node).Create the Flow
- Log in to the AiChat platform.
- Navigate to the Flows tab in the side navigation menu.
- Click the “Create Flow” button.
- Input a clear Flow Name and Description for easy identification.
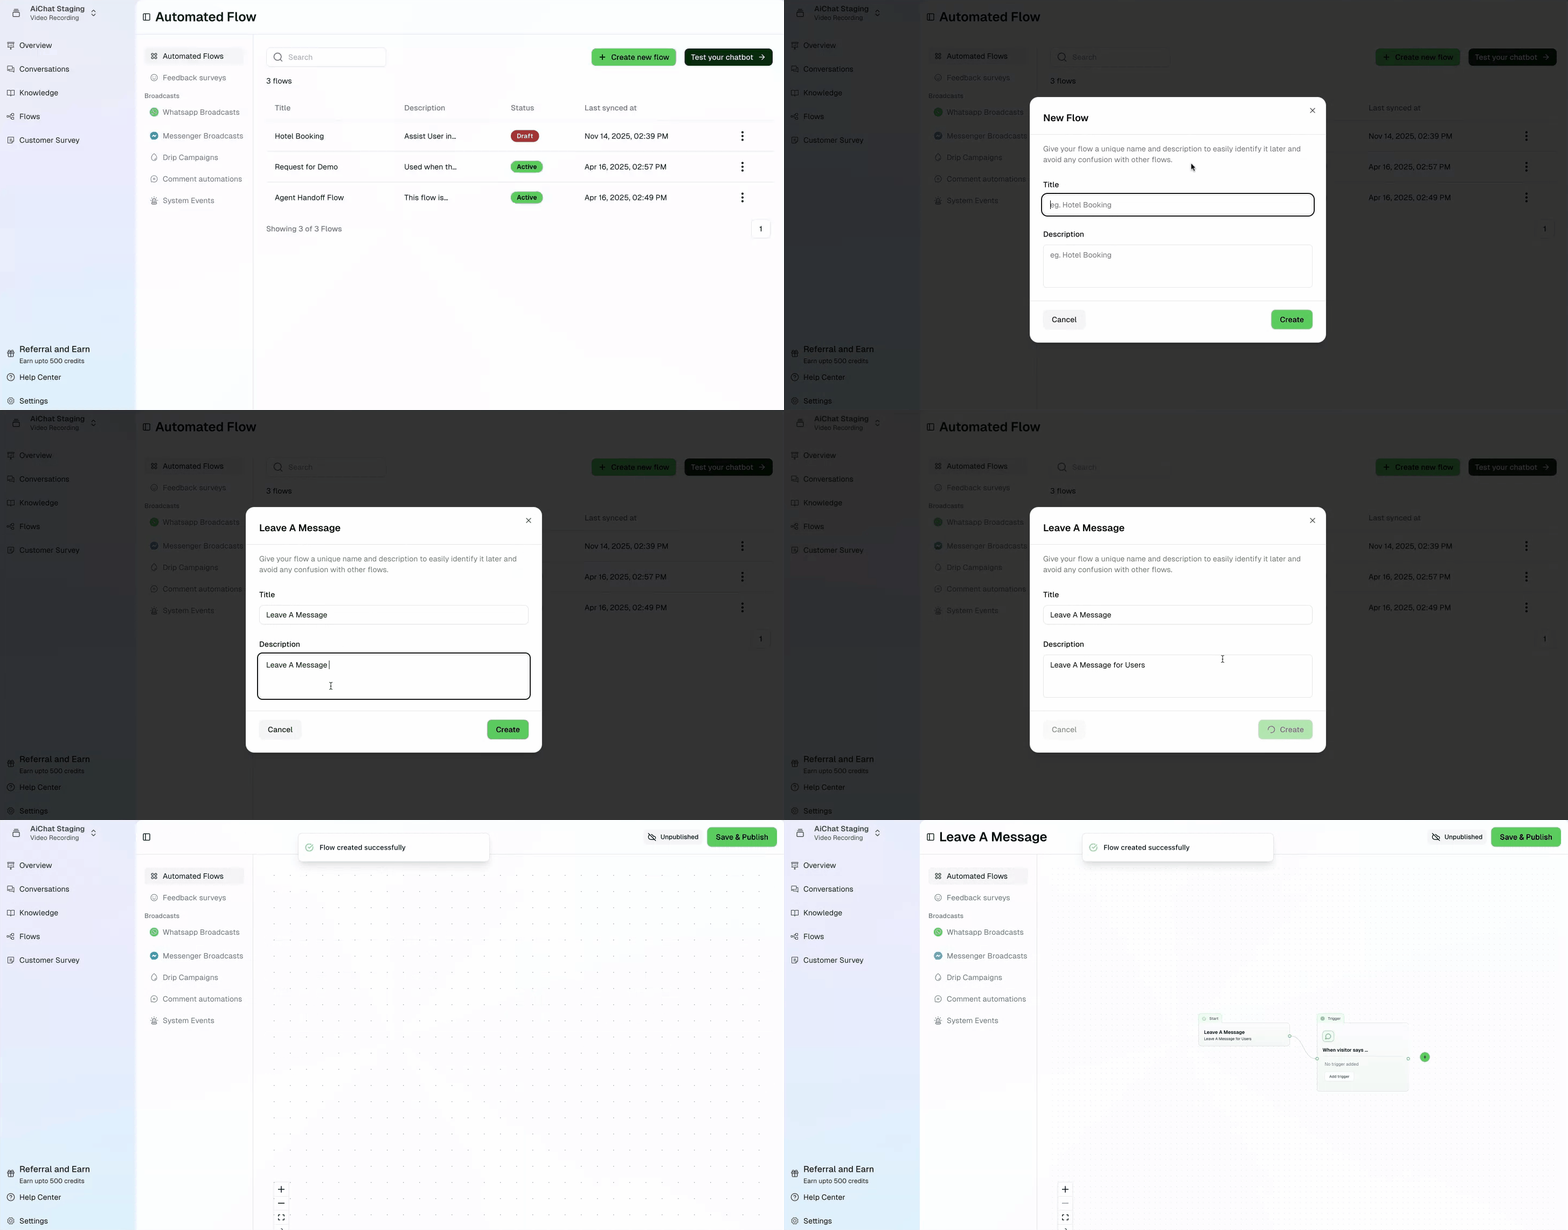
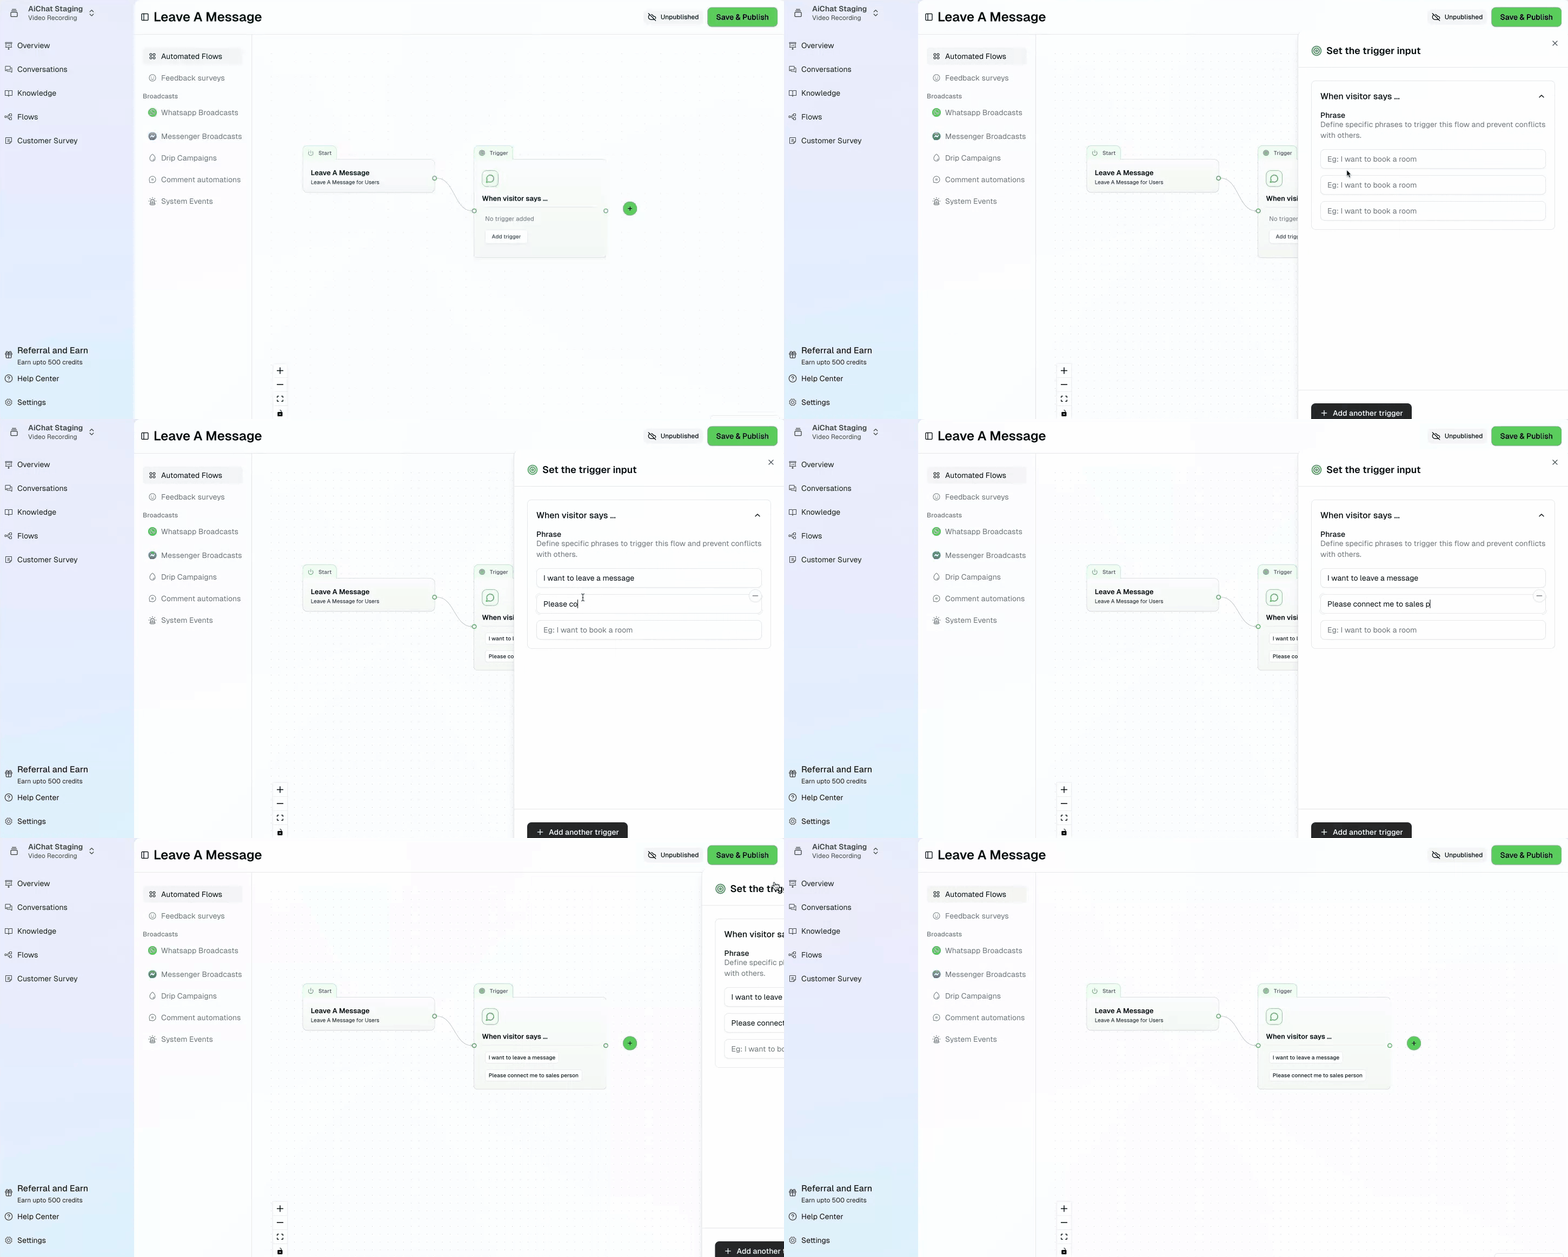
- Click “Add Trigger”.
- Input a maximum of five user Trigger Phrases (variations of the same user intent, e.g., “I want to leave a message,” “Contact us,” “Send a note”).
- Close the edit panel to save the configuration.
Add Nodes (Building Blocks)
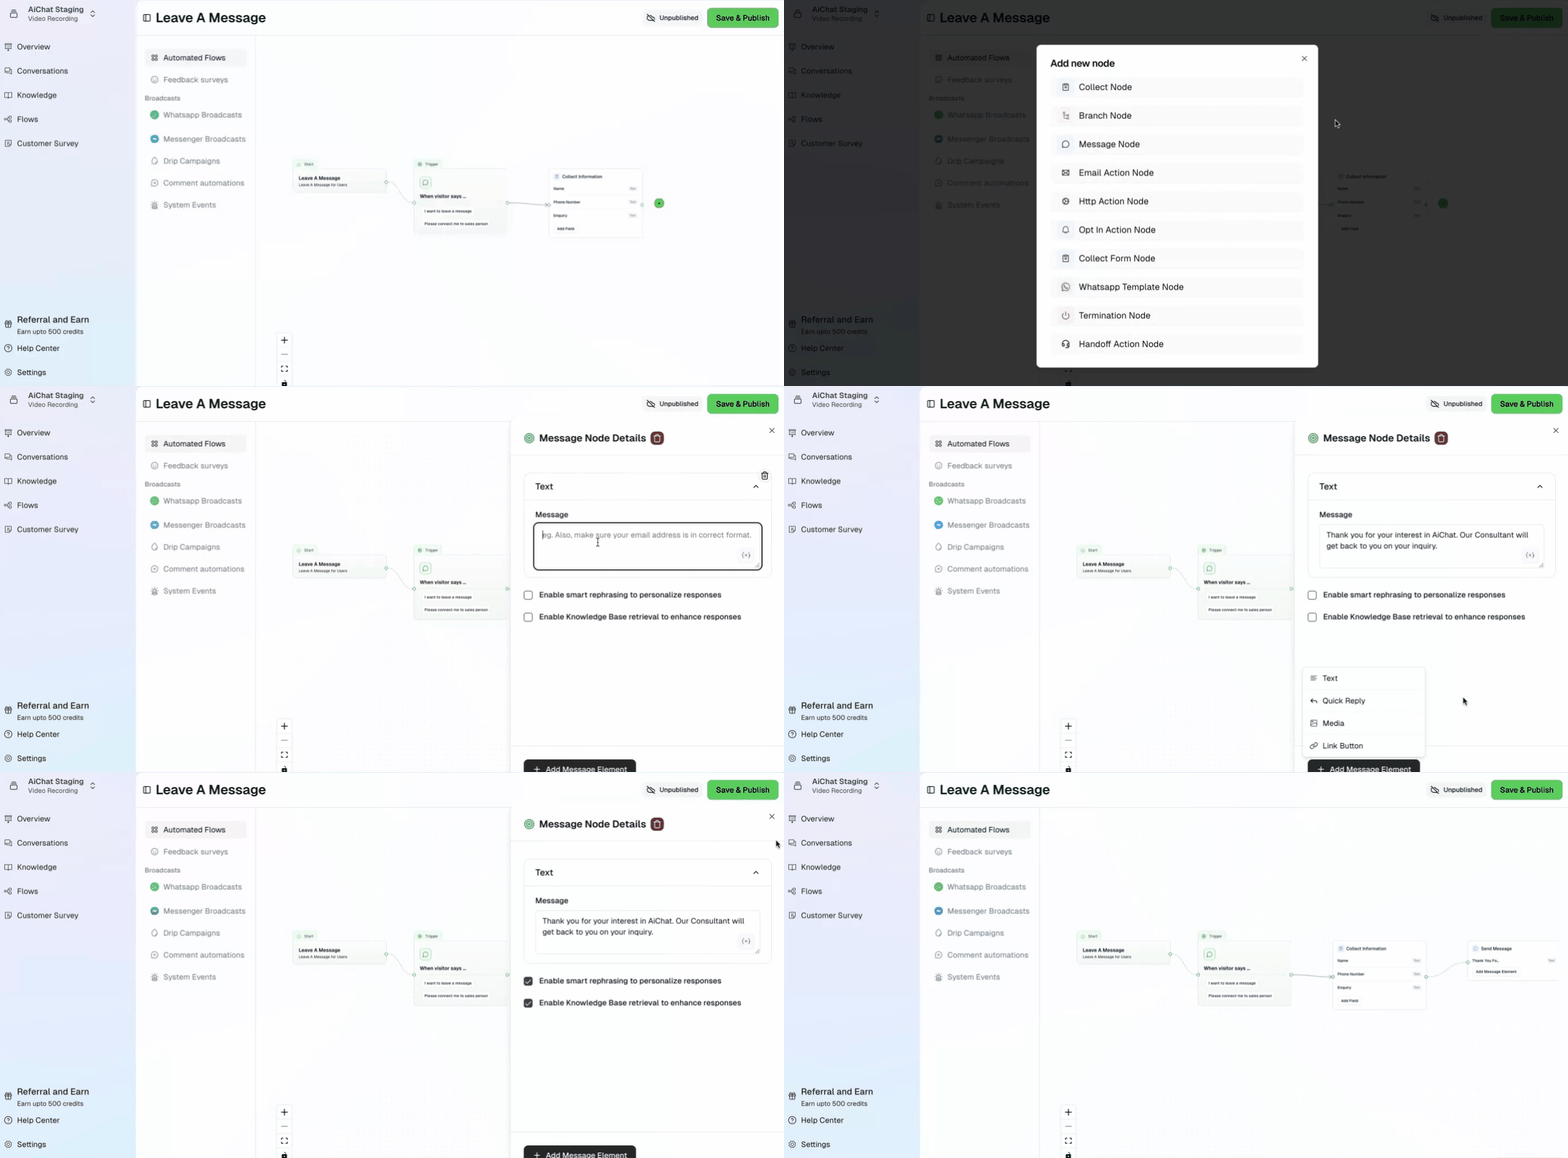
Nodes determine how the conversation progresses.Message Node
- Purpose: Defines the bot’s communication with the user.
- Key Configuration Details:
- Type: Supports text, quick reply buttons, and media.
- Text: Use for confirmations or thank-you messages (e.g., “Thank you for your inquiry.”).
- Dynamic Response: Use smart rephrasing for unique responses.
Collect Node
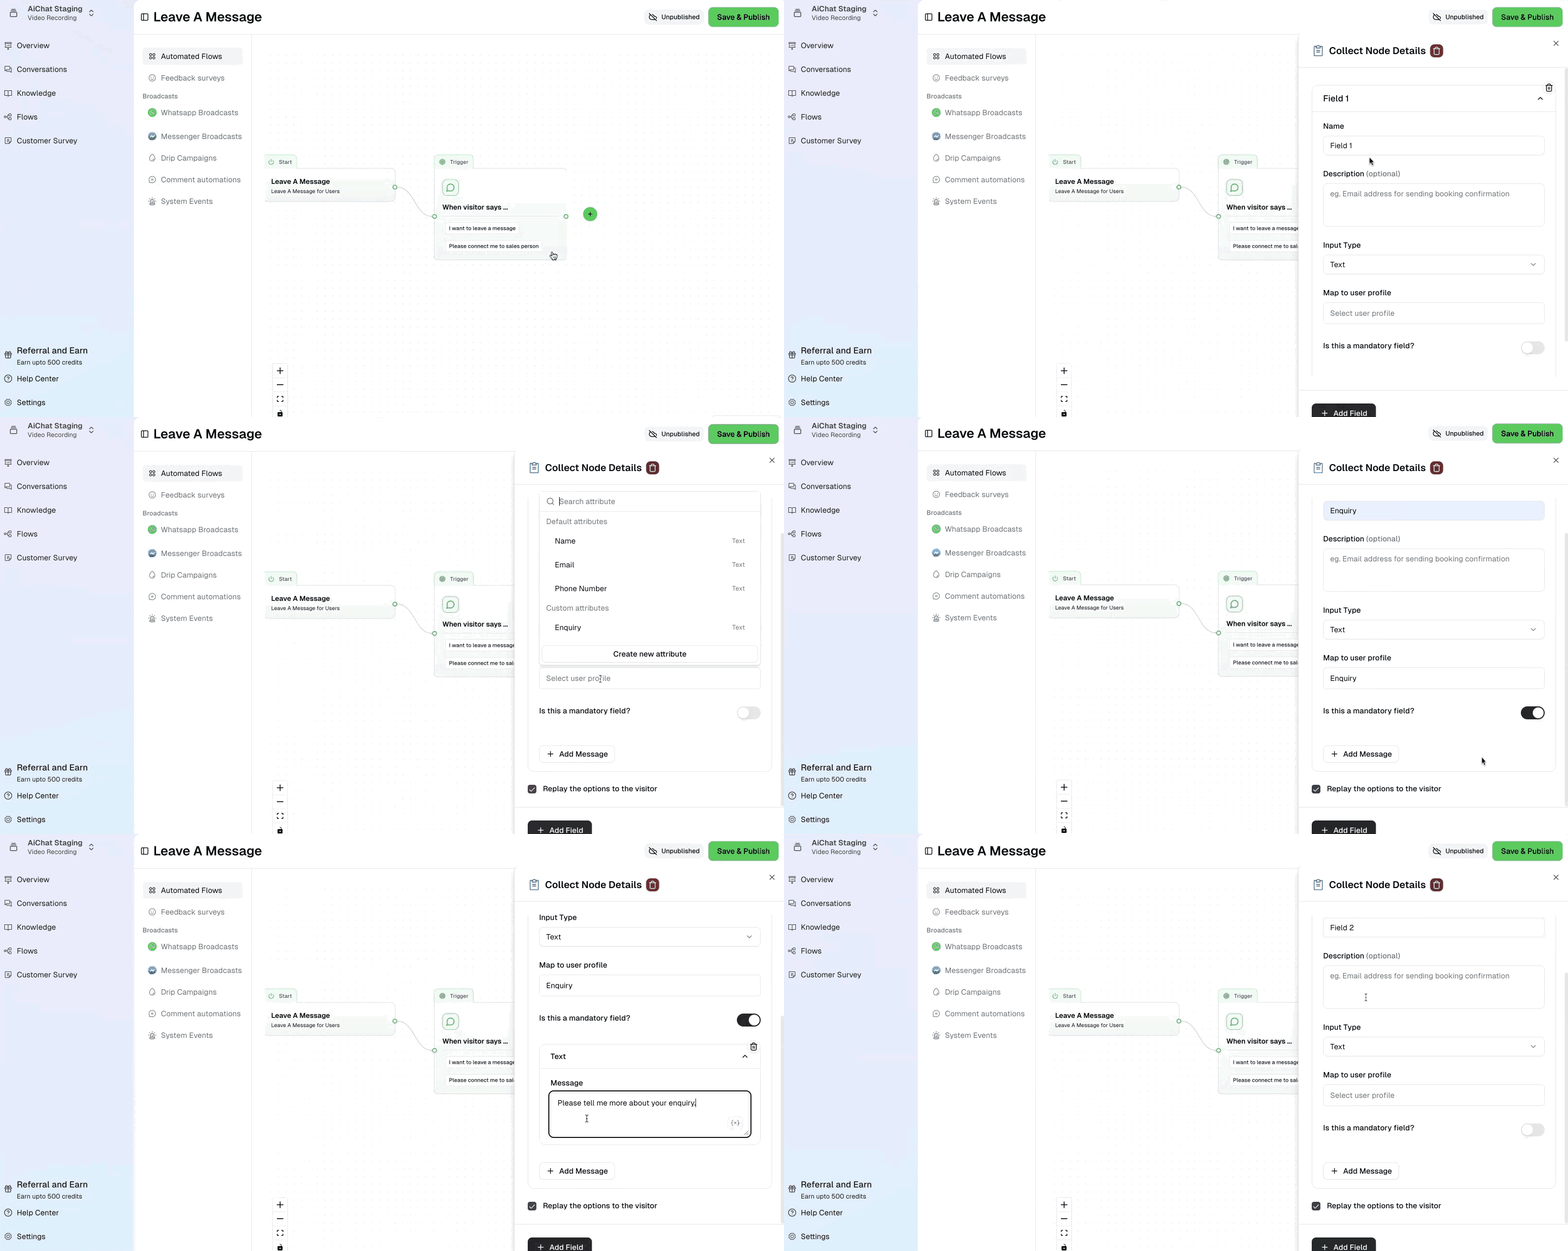
- Purpose: Captures specific user details, functioning like an online form.
- Key Configuration Details:
- Field Name & Type: Define the variable and data type (e.g., email, date).
- Mapping: Option to map the answer to the user profile.
- Validation: Set if the field is mandatory.
- Prompt: Customize the bot’s message (e.g., “Please enter your check-in date”).
- To add more fields, select “Add Field.”
Action Node - Email
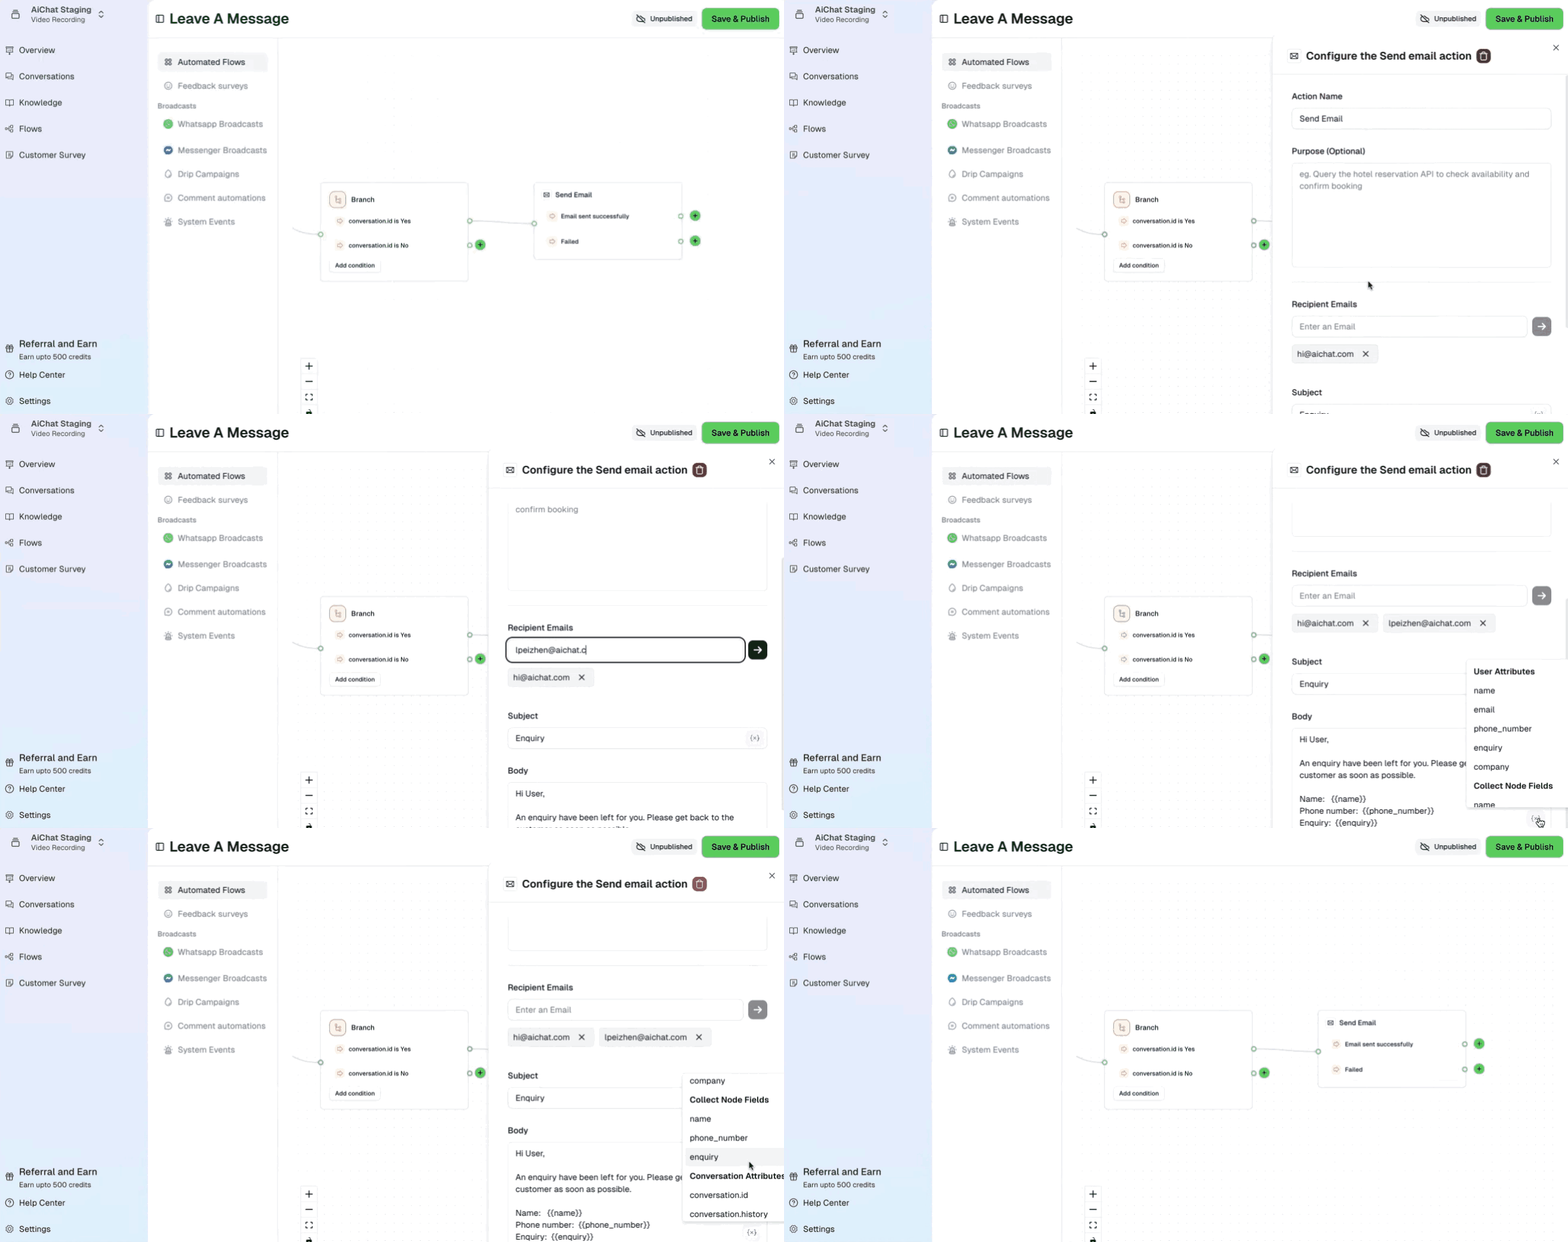
Purpose: sends email to target recipients. Email originates from AiChat’s no reply email address. Input recipient emails, subject, and body. Must define separate paths for Success and Failure of the email delivery.- You can personalise email Subject and the Body content by using placeholders x. Attributes from conversation profile will be used to personalise the email’s content.
Action Node - HTTP API
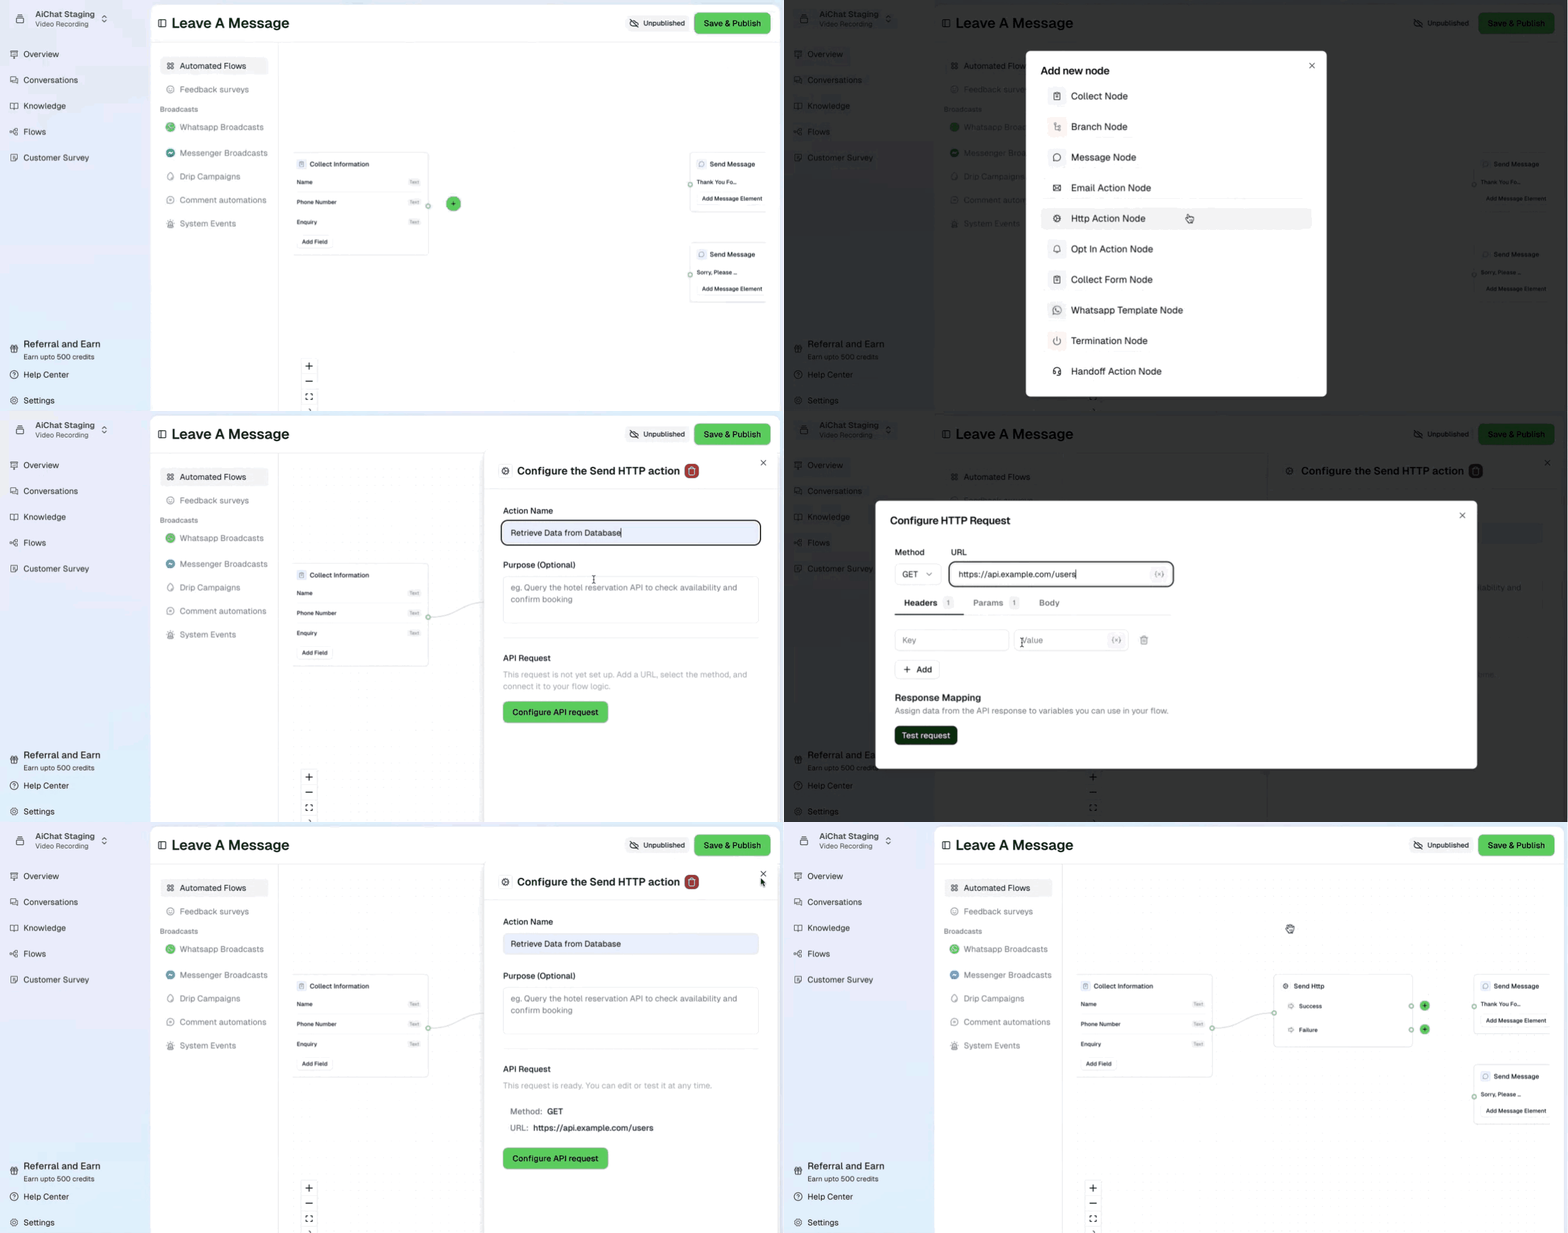
**Purpose: **Used for API calls (e.g., sending data to a CRM). Provide the API endpoint, method (e.g., POST), and body (e.g., JSON). Must define separate paths for Success and Failure of the API call.- The most important part is in the API request where you must provide the API endpoint that should be called by the AI Agent to retrieve data to send updates.
- You can use any RESTFul API standards; GET, POST, PATCH, PUT and DELETE.
- You can also include Basic or Bearer token under Authorization Headers if required, and add other header options.
Branch Node
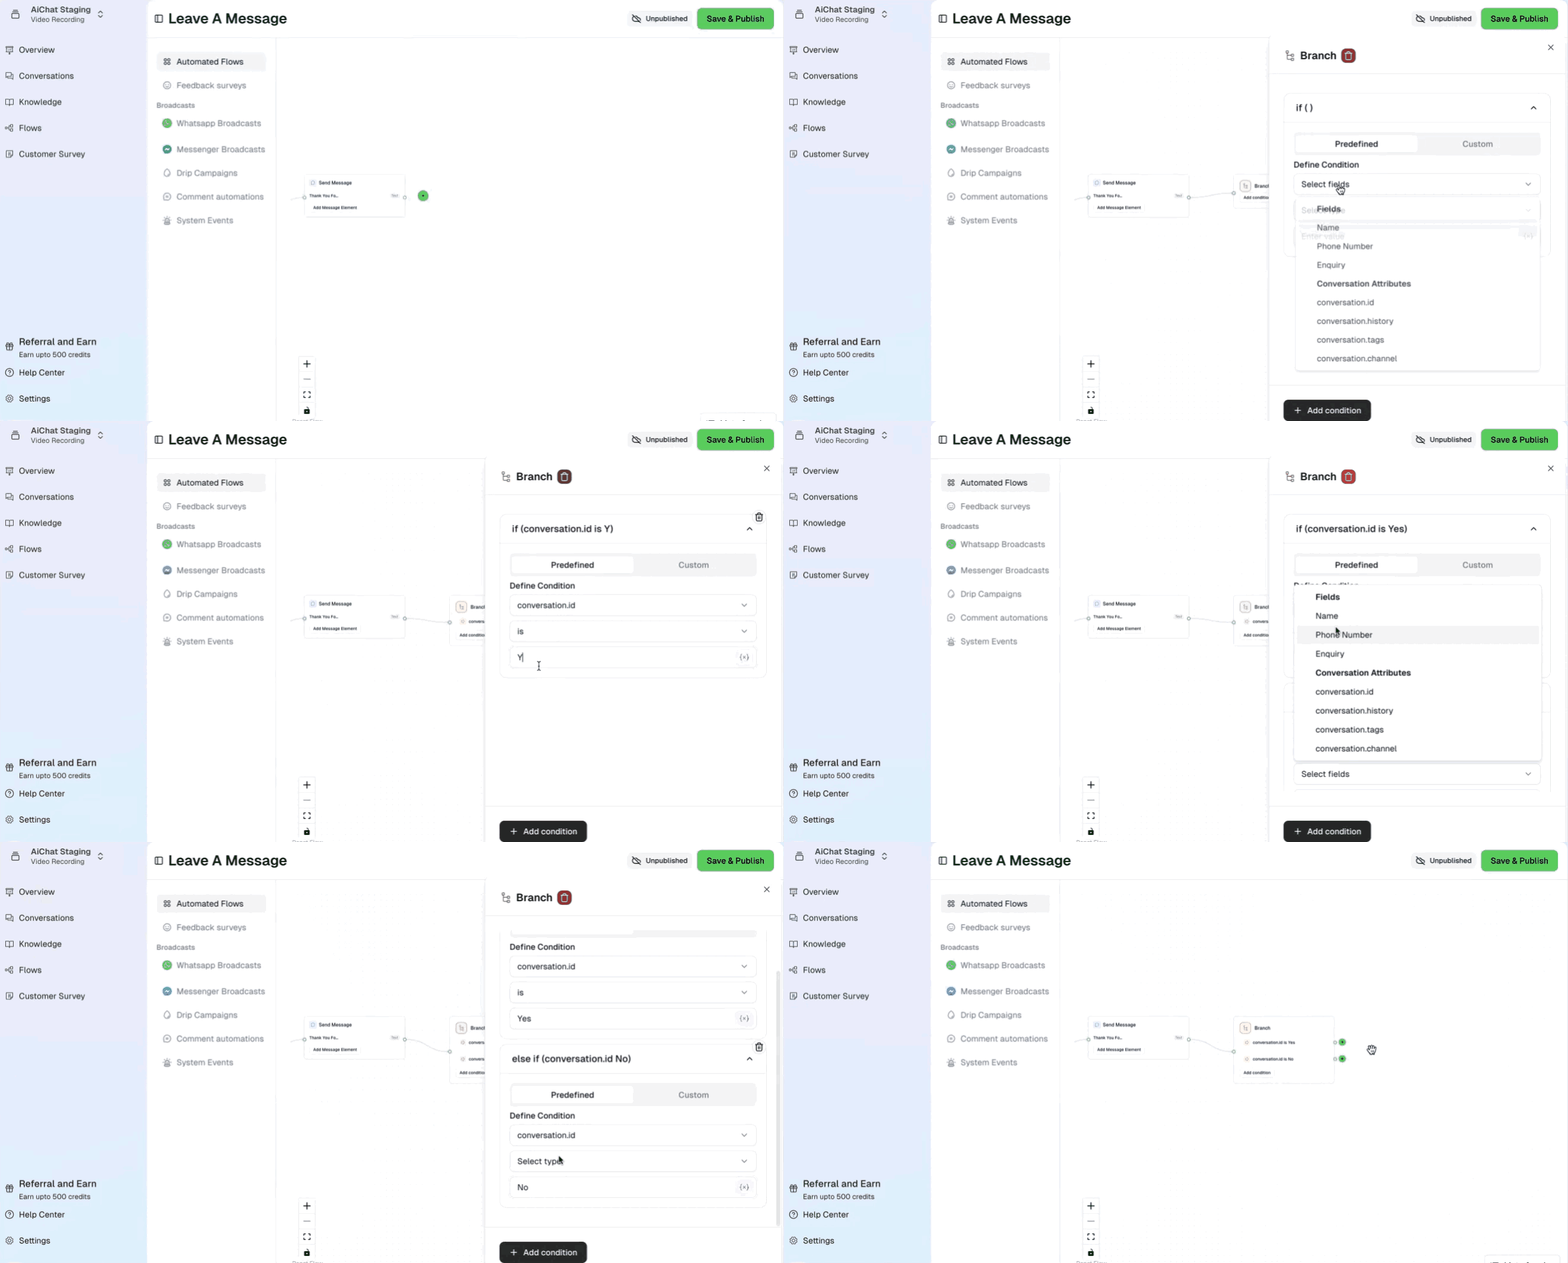
- Purpose: Branches the flow based on specified conditions (user profile data, collected data, etc.).
- Key Configuration Details:
- Conditions: Define criteria using pre-defined or custom logic (e.g., user_phone_number is not empty).
- Multiple Branches: Define different paths and responses for each condition met.
Save & Publish
Once satisfied with the flow structure and node configurations, click the “Save & Publish” button. This action makes your flow live and available to users.In Conclusion: Flow Builder enhances user engagement and streamlines business processes. Begin with simple flows, like lead collection, and gradually build complexity using conditional branches and powerful action nodes to create tailored conversational experiences.