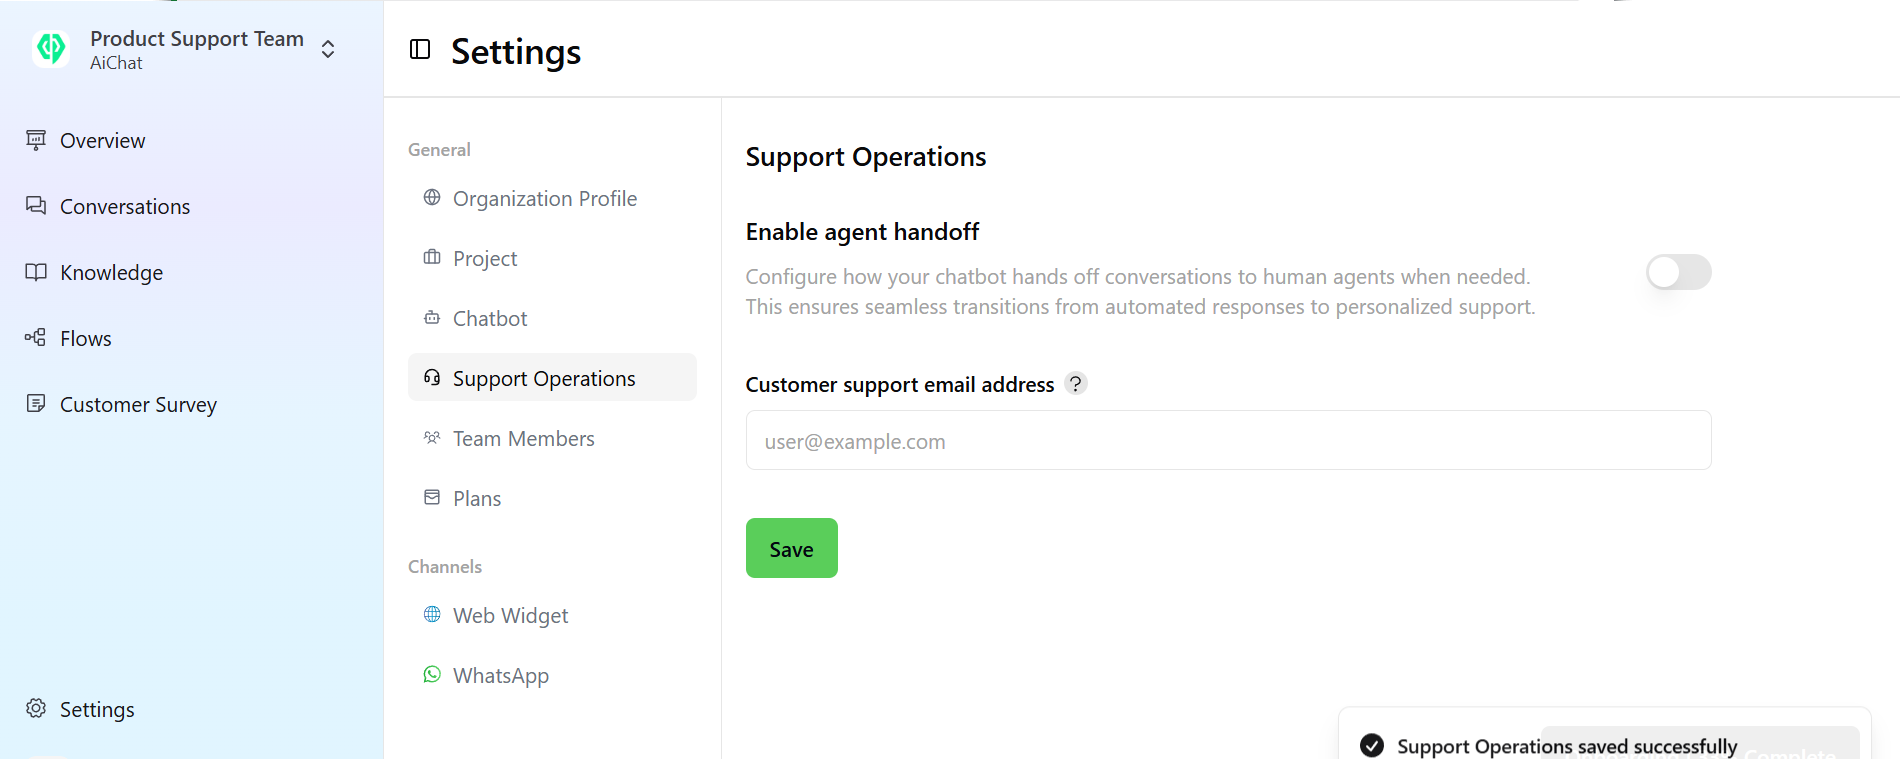
Activating Support Operations
Follow these steps to enable the live chat agent handoff functionality:- Go to Settings: Navigate to the main menu and select Settings.
- Access Support Operations: Within the Settings menu, go to Support Operations.
- Toggle On: Simply toggle the switch to activate the feature.
- Enter Agent Email: Input the email address of the live chat agent or support team who will receive the handoff requests.
Setting Up and Customizing the Handoff Flow
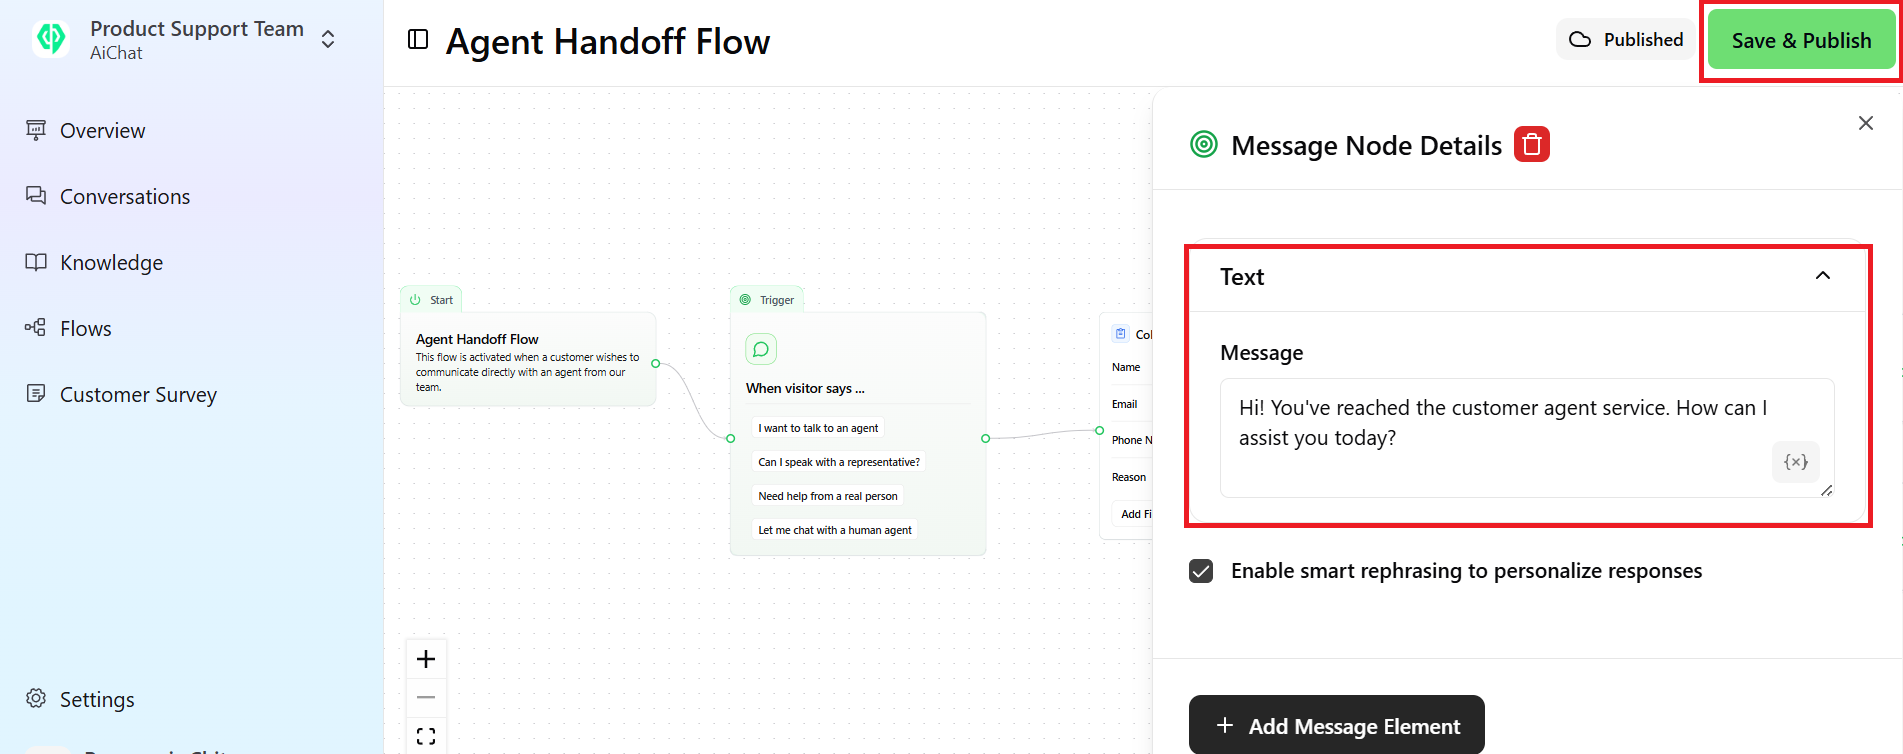
Once Support Operations is active, you can configure the conversation flow that manages the handoff:- Open the Flow Configuration: After saving the agent email, the Handoff Flow configuration will appear. Click Go to handoff flow to begin customizing.
- Understand the Flow Structure: The process follows a standard pattern: Start → Trigger → Collect User Information → **Send Notification → End. **
- We have already set up pre-defined fields to collect user’s Name, Phone Numbers, Emails and inquiries. Feel free to modify them to suit your needs. See how to configure Flow.
Configuring the Agent Handoff Flow
1. Understanding When to Customize the Agent Handoff Flow
Before setting up the handoff flow, consider customizing it in the following scenarios:- Expanding User Expressions: If users commonly phrase requests differently, add more trigger phrases to improve detection.
- Collecting Additional Information: If agents need more details before assisting users, include additional fields in the information-gathering step.
- Adjusting Messaging: Modify confirmation or error messages to align with your support team’s communication style.
- Optimizing Email Notifications: Customize the email content to provide agents with more context, reducing back-and-forth communication.
2. Steps in the Flow
Step 1: Triggering the Flow
The handoff flow activates when a visitor uses specific phrases such as:- “I want to talk to an agent.”
- “Can I speak with a representative?”
- “Need help from a real person.”
- “Let me chat with a human agent.”
When to Customize:
- If users frequently use other phrases, add more expressions to improve recognition and avoid missed handoff requests.
Step 2: Collecting User Information
By default, the chatbot collects the following details before transferring to an agent:- Name (Text input)
- Email (Email input)
- Phone Number (Phone input)
- Reason for contacting support (Text input)
When to Customize:
- If your support team needs extra information (e.g., order number, account ID), add relevant fields to the form.
- If fewer details are required, remove unnecessary fields to reduce friction for users.
Step 3: Sending Email Notifications
The system automatically sends an email to the support team with the collected user details.- If the email is successfully sent, the user receives a confirmation message.
- If the email fails, an alternative message informs the user.
When to Customize:
- If your team prefers a different notification method (e.g., Slack alerts, CRM integration), adjust this step accordingly.
- If email notifications need a specific format, modify the content to include essential details.
Step 4: Providing User Feedback
Once the request is submitted:- The chatbot informs the user that support has been contacted.
- If an issue occurs, an error message appears, suggesting alternative solutions.
When to Customize:
- If users require estimated response times, update the confirmation message accordingly.
- If alternative contact methods exist (e.g., phone support), include them in the fallback message.
Finalizing the Handoff Flow
- Review: Check all the steps and customizations in the flow builder.
- Publish: Click Save & Publish to make the changes live and available to your users.
Deactivating Support Operations
If you want to deactivate the support operations feature, simply toggle the switch off and click Save. This will disable live chat support, preventing conversations from being handed off to human agents until reactivated.